After flying too close to the muslin-eschewing sun and essentially making a skirt based on the measurements of the packet and having it end up about two sizes too small–thus taking some beautiful corduroy out of commission (sob)–I sacked up and bought some muslin to have on hand. I figured it’d come in handy because when I choose my sewing projects, I always want to run before I can even crawl.
Speakng of that: I recently got it into my head that I absolutely need to sew a pair of pants. I don’t really know why, but when the muses swiftly kick me in the toga, who am I to say no? Does it matter that I haven’t even sewn myself something nice and easy like a skirt yet, or that I’ve never sewn a zipper into a fly, or that I’m really bad at reading directions? Apparently not.
I am also a sucker for anything Art Deco-inspired, so when I saw the drawing for Ralph Pink’s Long Line Trouser, I was hooked. Nothing will do but a pair of those in dark green wool, said those damn muses.
Still smarting from my corduroy defeat at the hands of Rachel Comey V1247, I decided to cut into my expanse of muslin before wasting another piece of nice fabric. It’s a really good thing I did, too, because there were some Learning Moments. Like I said, I’m really bad at reading directions. Like, my eyes go over the words but they don’t translate into concepts in my brain until I start sewing and turning the fabric over in my hands–and even then sometimes it just never gels for me.
This muslin is a tangible example of that. The legs came together quickly and in a really straightforward way, which is the good news. Likewise, the waistband and crotch seams were no problem. There were, however, a few issues I ran into when making this muslin, and I am now aware of what I need to review and refine before I make the final version.
Firstly, the pockets. This is the first time I’ve done pockets, so I was already expecting to have to break out the seam ripper. Ralph’s instructions had me sew the outside pocket flap to one side of the pocket bag and then both sides of the pocket bag to the slash. That was fine. I cut the slash, leaving triangles at the end, and turned the pocket bag sides in. On my first pant leg, I sewed the pocket bag together and then, as per instructions, sewed up the seam allowances running parallel to the little end triangles. That resulted in a pant leg that looked like this:

not a good look
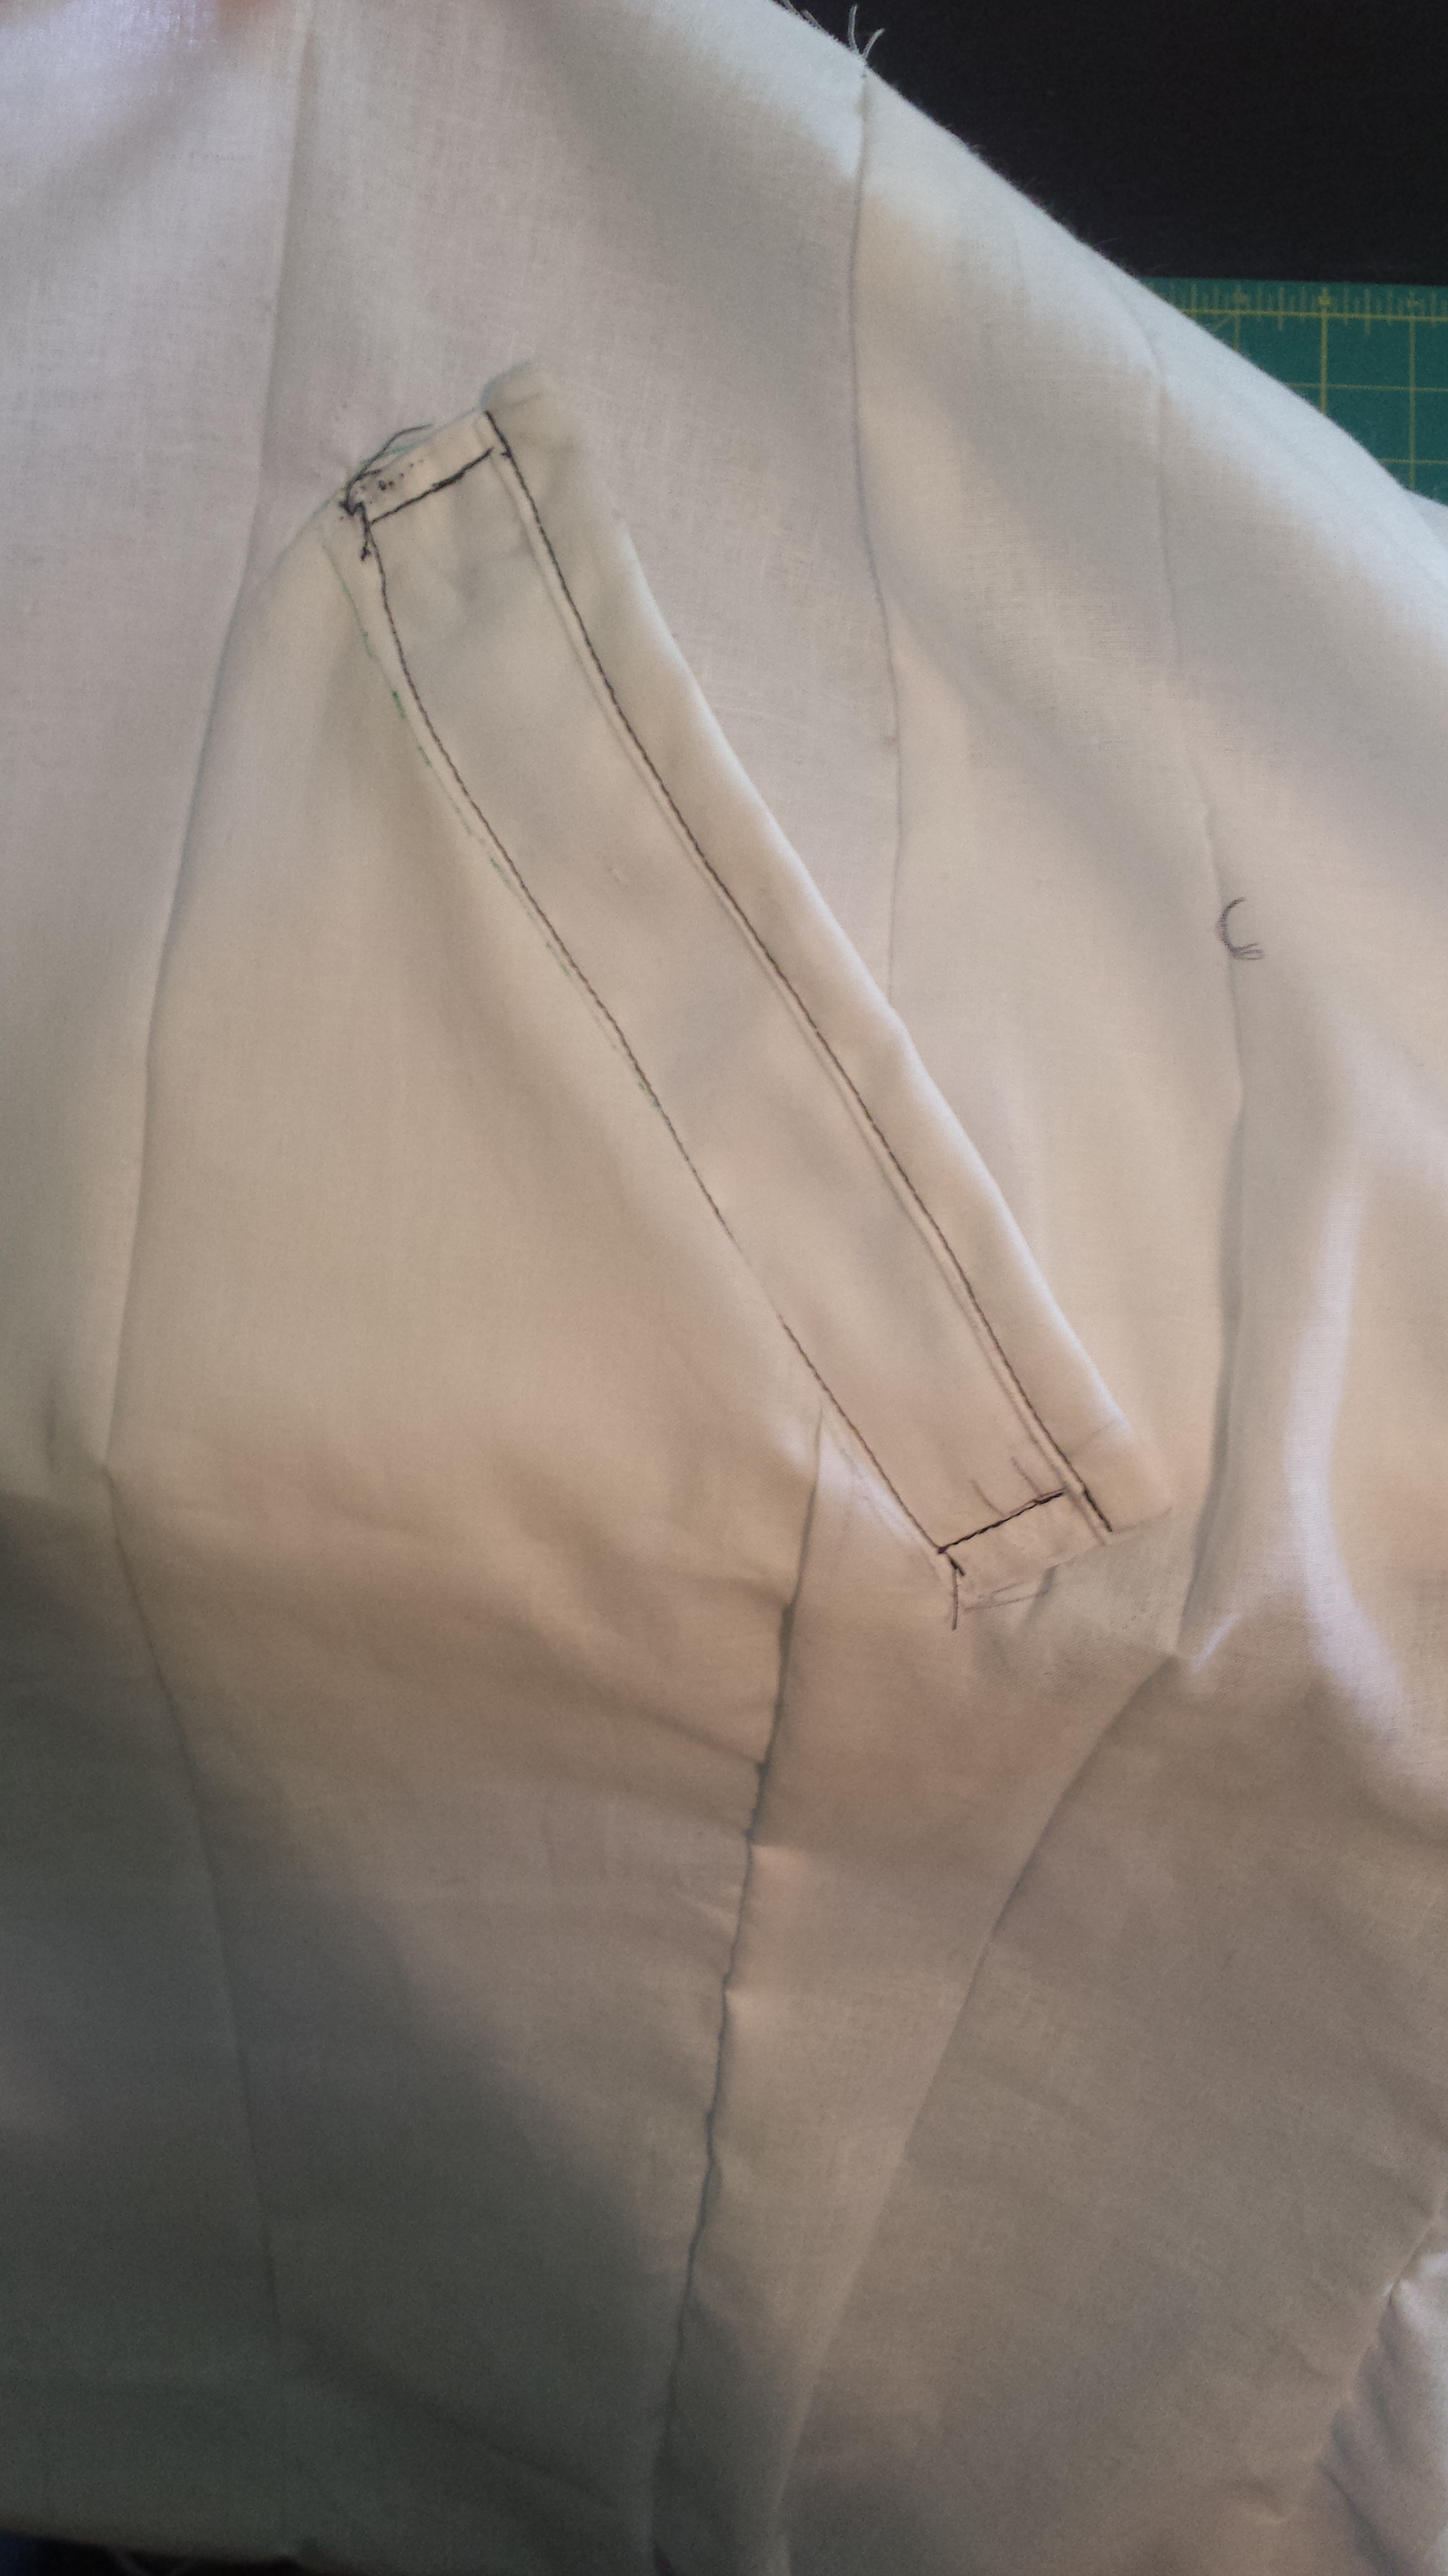
I accidentally created some sort of strange pleats, for lack of a better description. I’m chalking that up to user error instead of blaming the instructions. The triangle trick seems cool but still slightly out of my conceptual grasp; ultimately, I ripped out the stitching and instead sewed the front sides of the flap down. Here, you can see exactly how much cloth got caught up in the triangle fracas.

Which is to say: a ton. Thank god for seam rippers, y’all. As a point of note, the part stitched down in black thread is, in reality, supposed to be left folded over but unstitched, flapping around attractively, I can only imagine–a design feature which I will certainly adhere to in the final version. Anyway, the pockets on both legs ended up looking like this:
you are the wind beneath my pocket flaps
The front fly and zipper region is also a hot mess, and that is definitely due to my spacial ineptitude and my inability to understand instructions. The instructions theoretically make sense, but somewhere along the line I put in some errant lines of stitching and then eventually had to cut the fly open to put the pants on. By that point I was almost done and just wanted to see how the pants fit,and basically I Didn’tGAF. I’ll be ripping out the zipper anyway to use on my final version.
I carefully avoided taking any pictures of that region for this post, so instead you can feast your eyes on this shot of the waistband and seams on the back of the leg:

pressed seams, ooh la la!
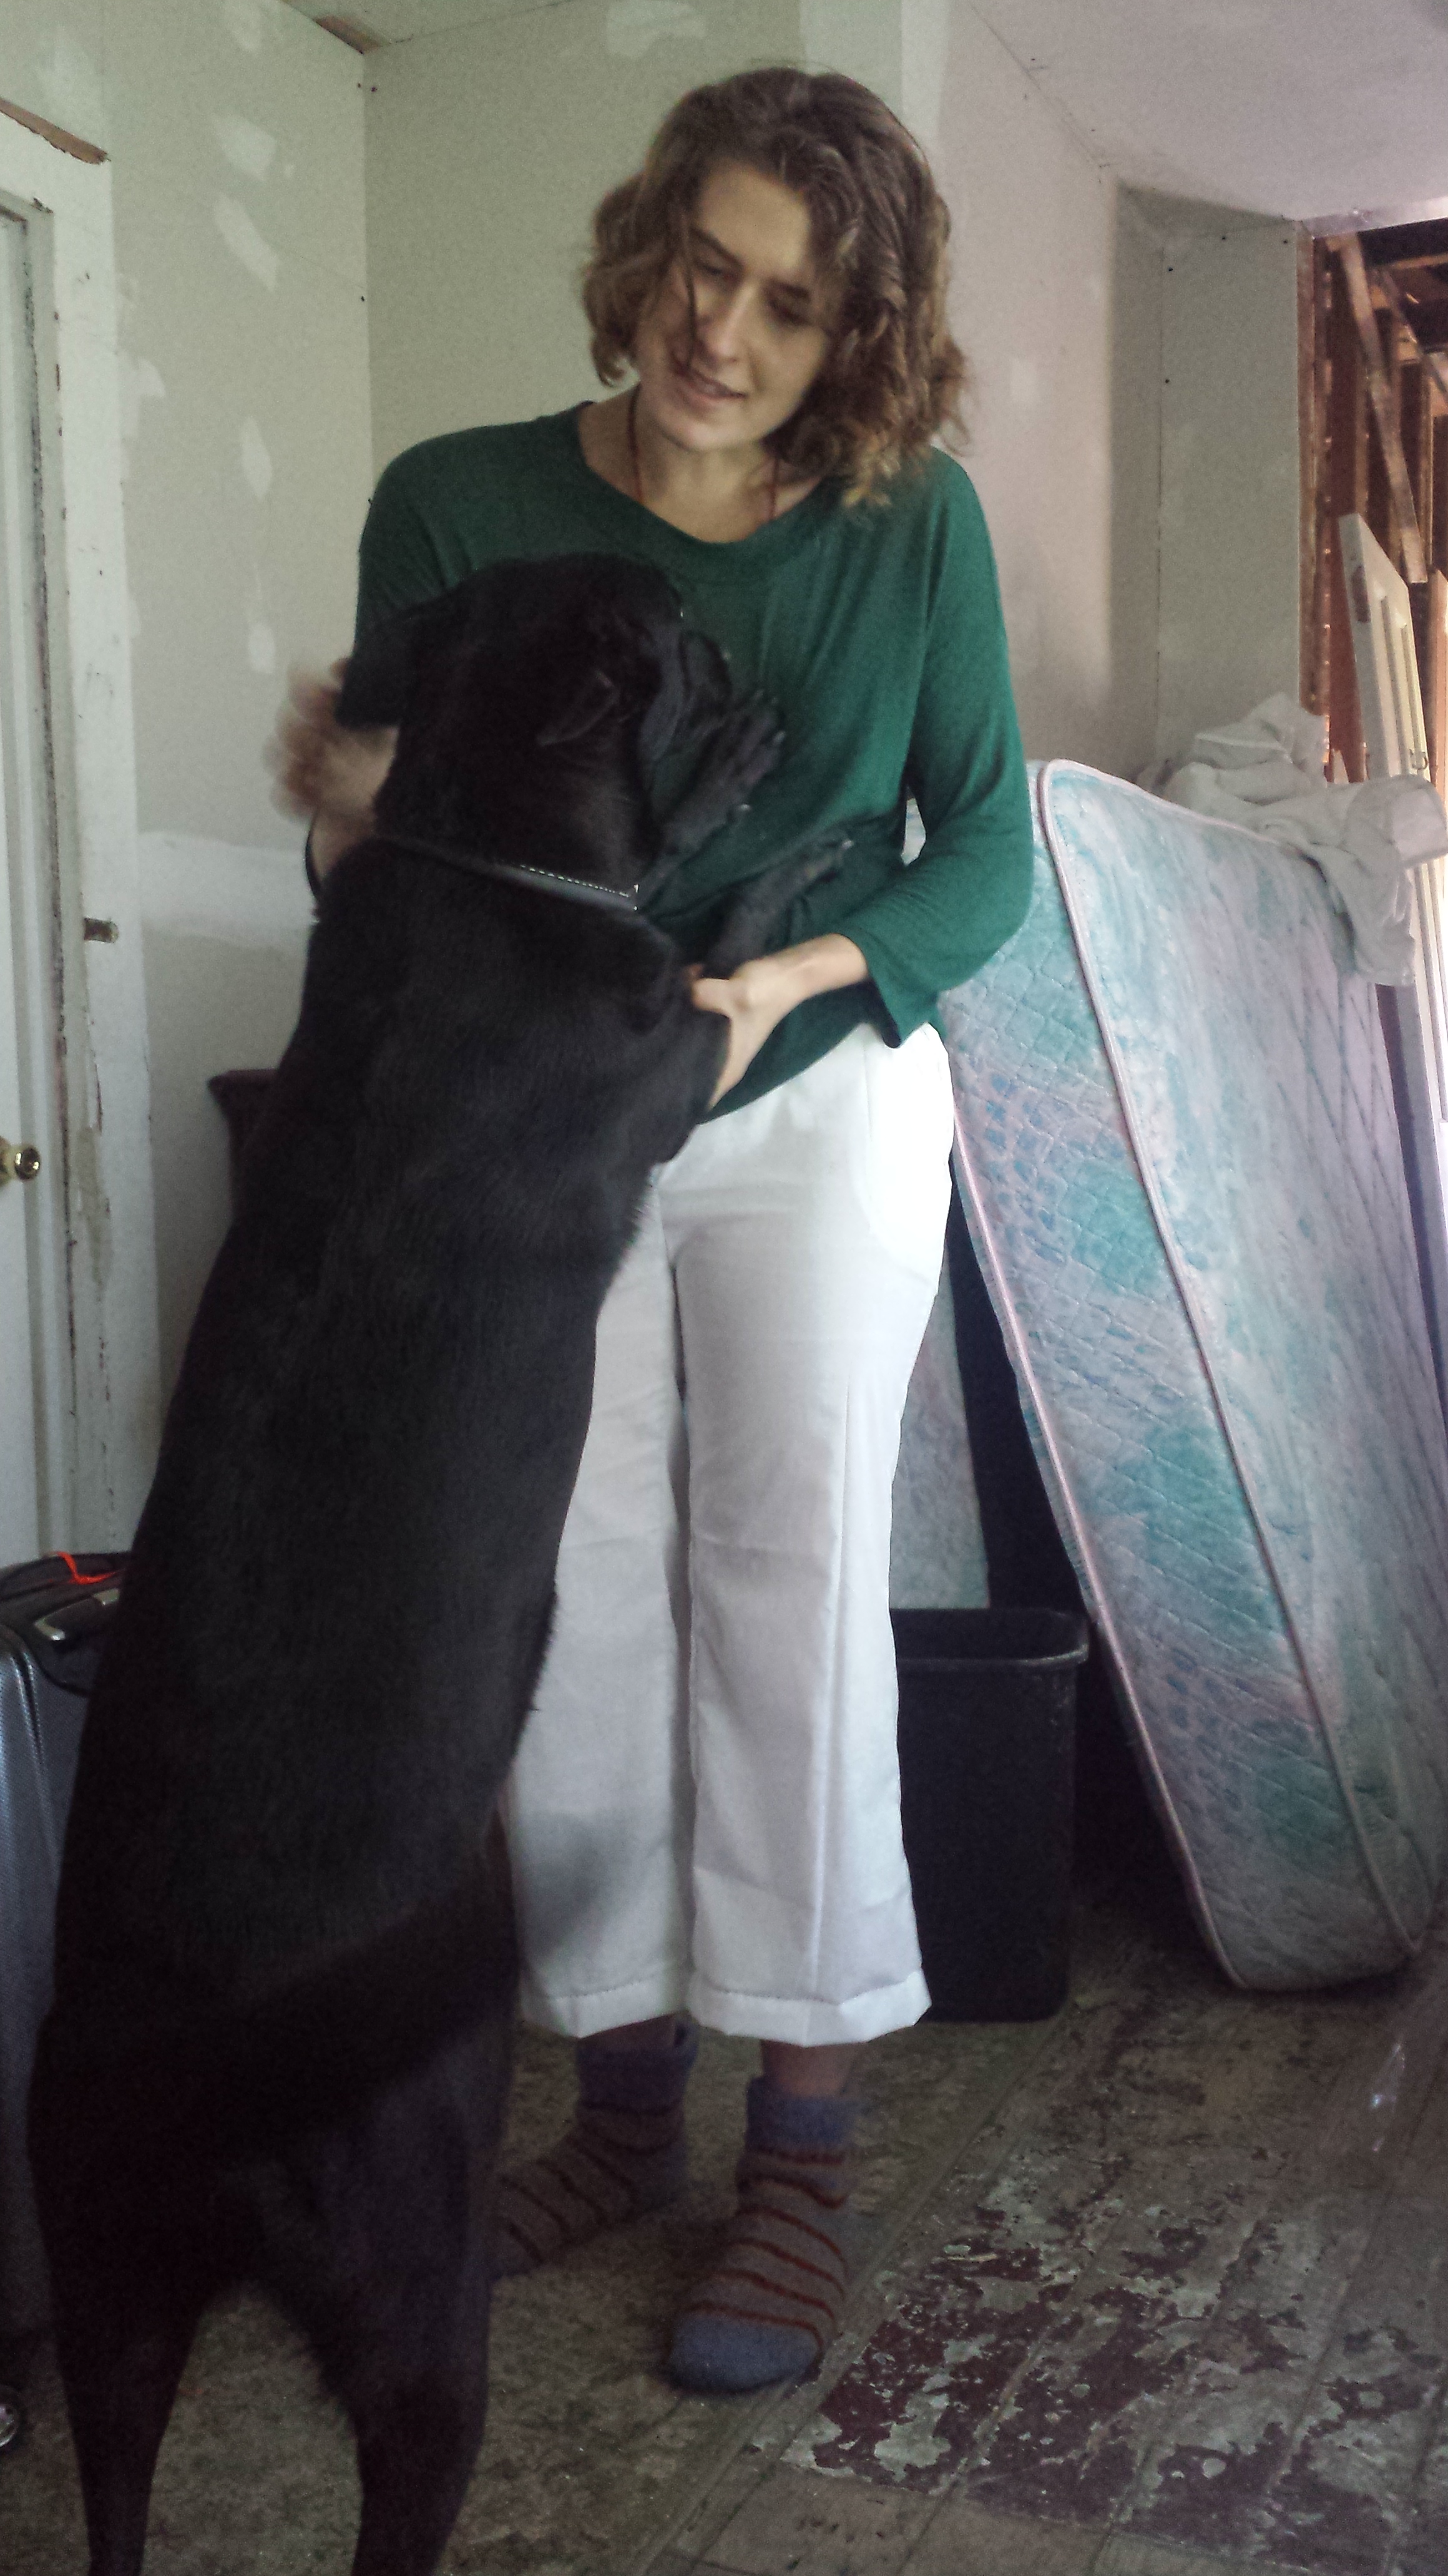
Aww yiss. Anyway, now what we all want to see: the finished muslin. Isis the Dog clearly wanted in on the pants action because she would not leave me alone while taking these pictures. Also, please excuse the diverse array of items in the background; I am living in an unfinished house and currently, things like extra mattresses come to rest wherever they may.

shoutout to my super warm slippers!

Isis: turn down for what?
I’m pretty happy with the fit. I do get a bit of a muffin top, but that’s due to the fact that I haven’t been to the gym in two weeks, and not because of the pattern’s fit, which is pretty good for right out of the box and no alterations. I love the curved seam down the back and think it accentuates my legs wonderfully. All in all, I feel quite smanging (a descriptor I’ve coined from the verb). I’ll be interested to see how the pants drape in a heavier fabric. I think they’ll go great with my lounge turban, which I busted out on Friday for the first time in this year’s cold season (double smang!). So, as the weekend winds to an end, I’ll be taking a long, hard look at fly front zipper tutorials and psyching myself up to sew the same exact thing again–just tidier.
